

Welcome to Your Weekend Project, featuring how-tos and ideas from our archives for an organized and inspired home.
After spotting leather baskets (see my post: Woven Leather Storage Baskets), then custom bedside trays at various Ace Hotels, I decided that the junk removed from the average pocket (keys, lint, and change) looks much better when enveloped in a nest of supple leather.
The discovery left me convinced I could replicate the look or at least, get pretty close. Read on for step-by-step instructions to make your own leather tray.
The Inspiration

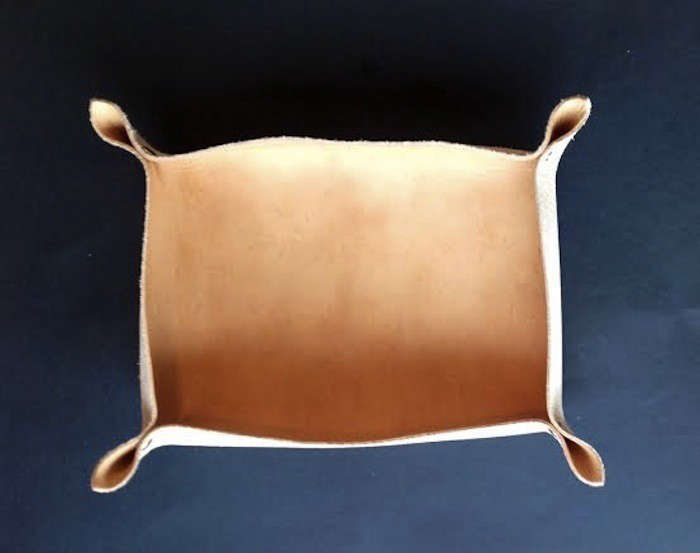
My Finished DIY Project
The Materials
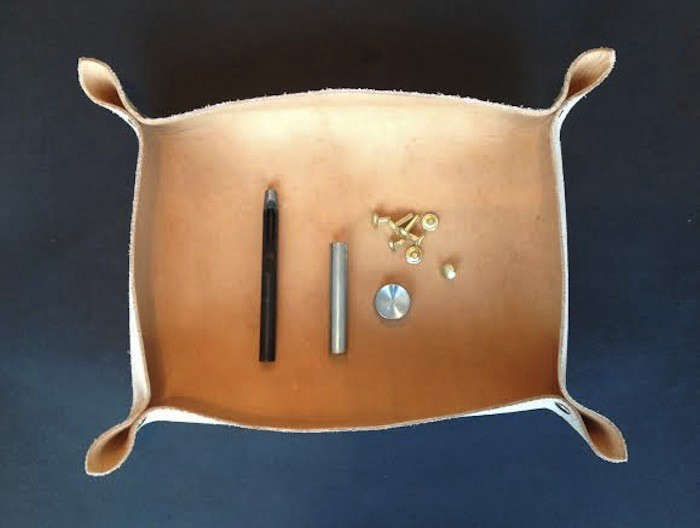
- One piece of Tooling Leather; $17.43 at Amazon or sourced from your local hardware store
- Four Metal Spring Clamps (optional); $6.55 for set of 6 via Amazon
- Pair of Leather Hole Punch Pliers ($7.43 at Amazon)
- A Rivet Setter ($3.99 each), a Rivet Anvil ($2.99), and one 100-pack of medium Solid Brass Double Cap Rivets ($22.99) all available at Tandy Leather Factory
The Directions
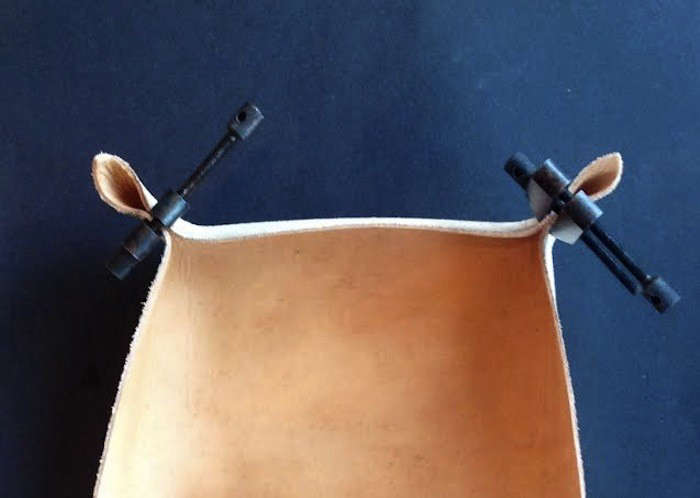
Step 1: I first used small clamps to form the edges of the tray and make punching holes in the corners easier.
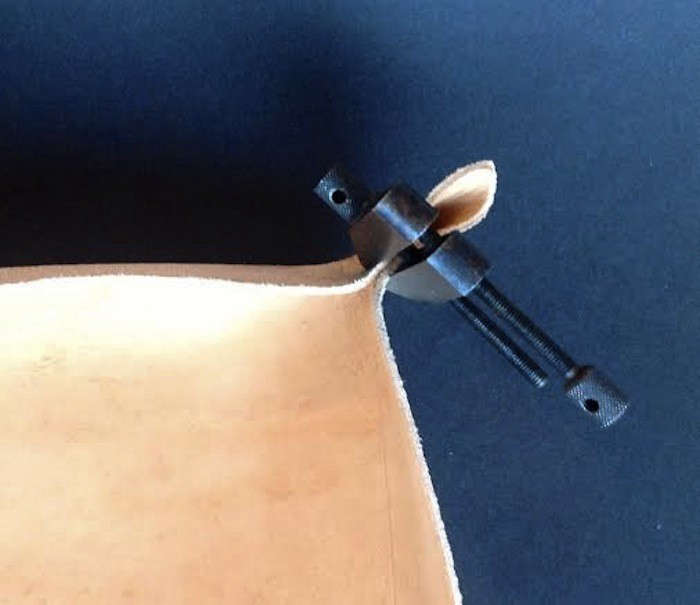
Step 2: Use a pencil to mark the position of your holes (a total of eight markings); a ruler comes in handy, too; you want each to be in the exact same spot. Then squeeze the edges of each corner together and use the leather hole puncher to cut out your holes.
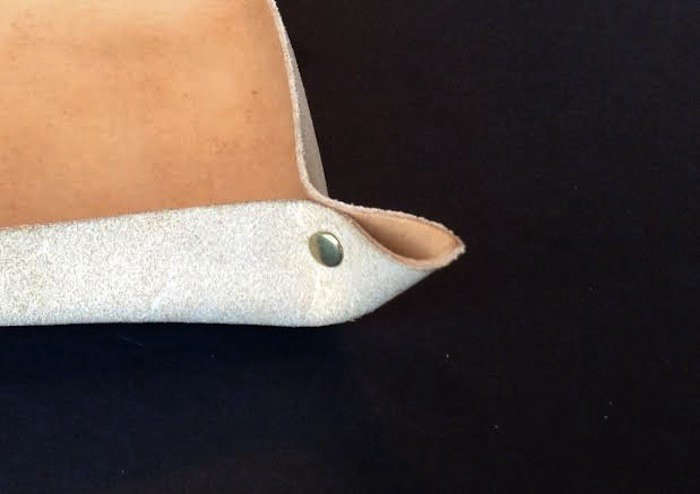
Step 3: Thread a rivet through each hole and use the rivet setter to attach the two sides of the rivet together. Repeat on the other three corners–and you’re done! The project was much easier and less expensive than I had anticipated.
N.B.: This post is an update; it was originally published on Remodelista on February 5, 2014.
Into easy DIY projects? Check out:
Products in this Post:
-
Ace x Billykirk Tray
$35.00 USD from Ace Hotel
-
Buffalo Calf Leather Tray, Small
$42.00 USD from Canoe
-
Tooling Leather Piece : Natural
$14.03 USD from Amazon
-
SE 326SC6 6-Piece 2-Inch Metal Spring Clamps
$3.11 USD from Amazon
-
Leather Hole Punch Pliers
$8.44 USD from Amazon
-
Craftool Rivet Setter
$3.99 USD from Tandy Leather Factory
-
Craftool Dot/Rivet Anvil
$2.99 USD from Tandy Leather Factory
-
Solid Brass Double Cap Rivets
$19.99 USD from Tandy Leather Factory


Have a Question or Comment About This Post?
Start the Conversation