

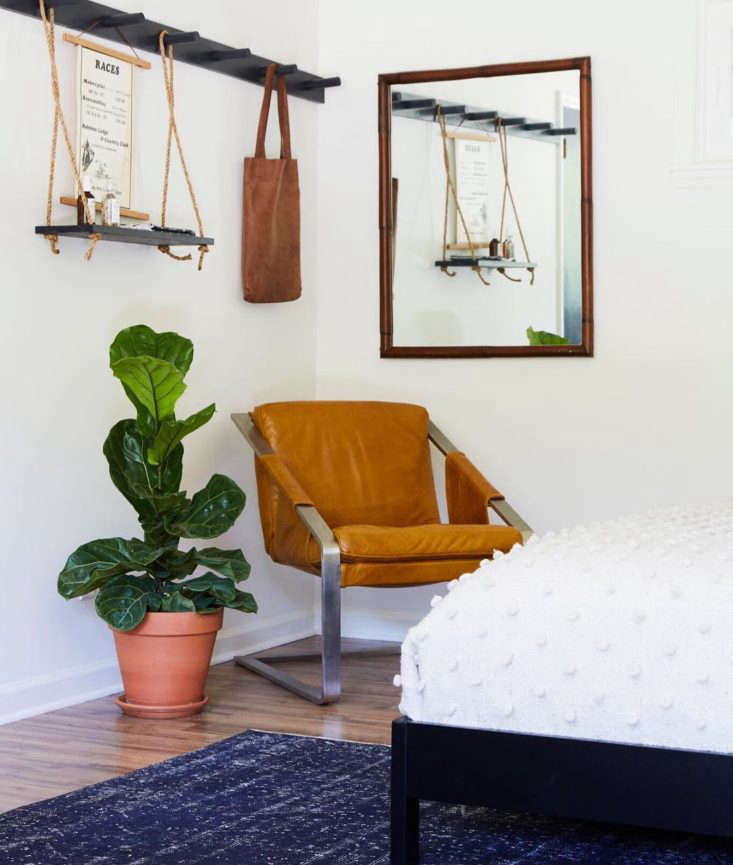
The Woodhouse Lodge was recently transformed from what was essentially a 1960s motor lodge into a casual and hip inn for Catskills weekenders. Margot wrote about the new hotel last week, and I was impressed by just how much of the rehab was done by its owners: New York interior designer Megan Pflug and her artist husband, J. Penry. Megan even DIY’d, in her words, “a zillion Shaker peg rails.” “I used Shaker rails in most of the rooms—the Shakers were the original modernists, after all, and they lived in this part of the country,” she told Margot.
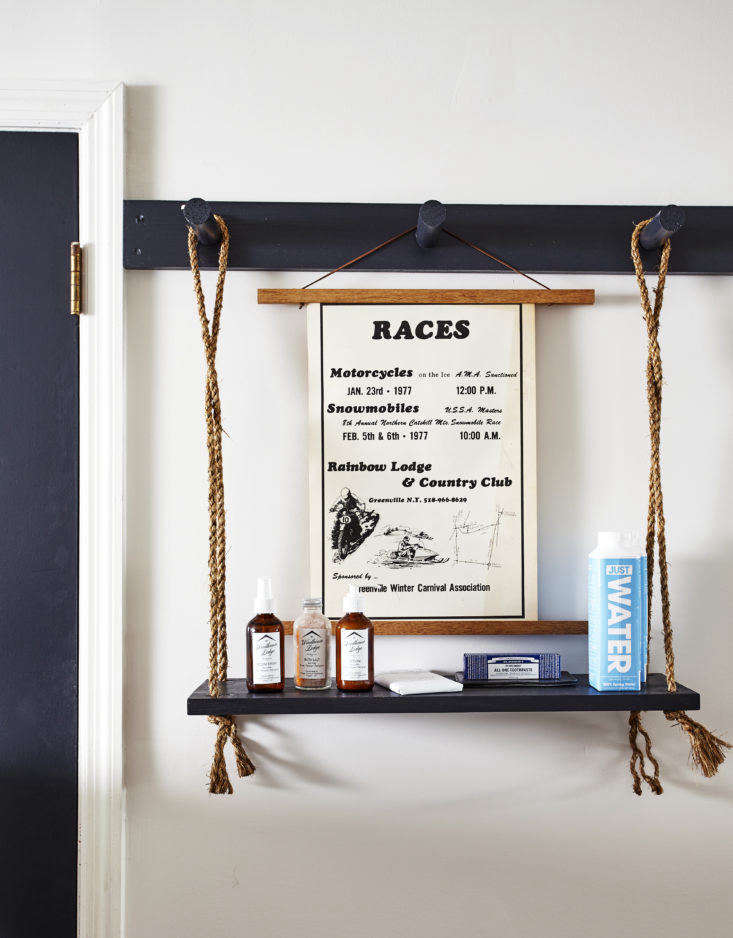
For those of you who know your way around a toolbox, go to her website to learn how to make those peg rails. For the rest of you (those who still have to ask, “Which one is the Phillips?”), buy a peg rail (here are some favorites), and read on for truly easy directions on how to re-create this very cool peg rail accessory—a rope-hung shelf.
Photography by Frank Frances Studio, unless noted.
The Materials
- Peg rail, preferably one with long pegs
- A 1-by-10-inch plank of wood, cut to desired length (Megan suggests no longer than five feet)
- Two strands of rope, cut to desired length
- Electric drill
- 1/4-inch drill bit
- Tape measure
- Sandpaper
- Paint (optional; Benjamin Moore Night Club, shown)

Directions
- Measure about 1.5 inches in from each end and mark where the holes will be (two on either end). Use a tape measure to make sure holes are aligned.
- Use 1/4-inch bit to drill holes.
- Give the holes a light sanding.
- Paint, if desired.
- Thread rope into holes to create a loop at each end and knot.
- Adjust if necessary. Says Megan: “It can take a little trial and error to get your shelf even. Luckily you can quickly adjust the position of the knots so that the loops of rope are equal in size on both sides of the shelf.”
More easy DIY projects await! See:


Have a Question or Comment About This Post?
Start the Conversation