
When I was a little girl, my grandmother would solicit my help polishing the holiday silver. Making tarnished things shiny and sparkly? I was so on board.
Nowadays, this busy adult is a little less enthused. The Internet was quick to offer a plethora of easy DIY solutions. Unfortunately, if one is to believe the excoriating remarks left in the Comments sections, about 99 percent of them can actually damage your silver.
Researching the matter further, here is what I gleaned: If you’re going to invest in silver, you also need to invest the time to care for it properly. But if you do so, maintaining your silver is not as hard as you think.
Basic Care

As with football, when it comes to silver, the best offense is a good defense. Tarnish requires rubbing to remove it. This not only exposes your precious silver to potential scratches, the process actually removes trace amounts of the silver. Fortunately, with proper care, polishing can be kept to a minimum.
Use
Here’s the good news, the most important tip for keeping silver polished is to use it. Silver that is used and washed daily doesn’t tarnish. So upgrade your everyday and get out the silver.
Handling
Because silver is a very soft metal, any excessive rubbing, handling, scrubbing, or even polishing will wear and mar the finish, so always handle and treat silver with care. Any scratch or dent will make an excellent repository for more tarnish.
Washing
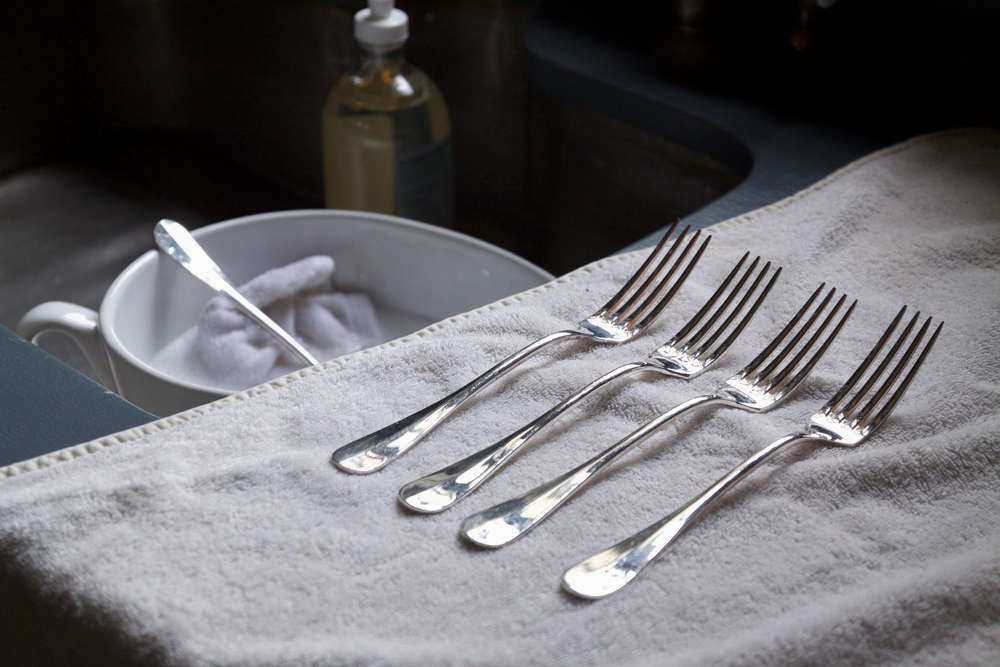
Food further exposes silver to elements that accelerate tarnishing. Therefore, you should always handwash silver immediately after use. Here’s how:
- Gather dirty silver into a napkin or cloth; don’t let it rattle around on the bottom of the sink where it can get scratched.
- Using a phosphate-free soap to avoid spotting, gently wash with a soft cotton cloth or sponge. Never scrub or use an abrasive scrubber.
- Dry silver immediately with a soft cotton cloth.
- Avoid lemon-scented soaps. Acid is not good for the silver.
- Never put silver in the dishwater, as heat and harsh detergents can cause pitting and can actually wear off the silver and/or the patina.
Storing

Proper storage minimizes silver’s exposure to tarnishing elements.
- Store your silver in specially made silver cloth, which is designed to absorb sulfur. You can also buy flat cloths to line drawers. Be aware that as these absorb more sulfites and chlorides they will become less effective. You can also wrap your silver in acid-free tissue paper and store it in an air-tight ziplock bag.
- If you actually want to look at your silver, its best to display it in a glass-fronted cabinet, which will minimize exposure to the air and other tarnishing elements.
- Store with china and glass, not with plastic, wood, or fabrics.
- You can also place anti-tarnish agents such as Silverguard Anti-Tarnishing Blocks or Anti-Tarnish Strips in cabinets and drawers, which absorb and neutralize the sulfide vapors in an enclosed environment.
Polishing

Supplies
- Phosphate-free, non-lemon scented soap
- Soft cloth to cover you work surface
- Gentle cotton cloth, or cotton balls or swabs, for cleaning
- For tougher jobs, a soft natural-bristle brush
- A mild commercial cleaner. Silver restorer Jeffrey Herman offers a handy list of Silver Polish Abrasion Rates.
- Untreated cotton, latex, or nitrile gloves
- Renaissance wax (optional)
Instructions
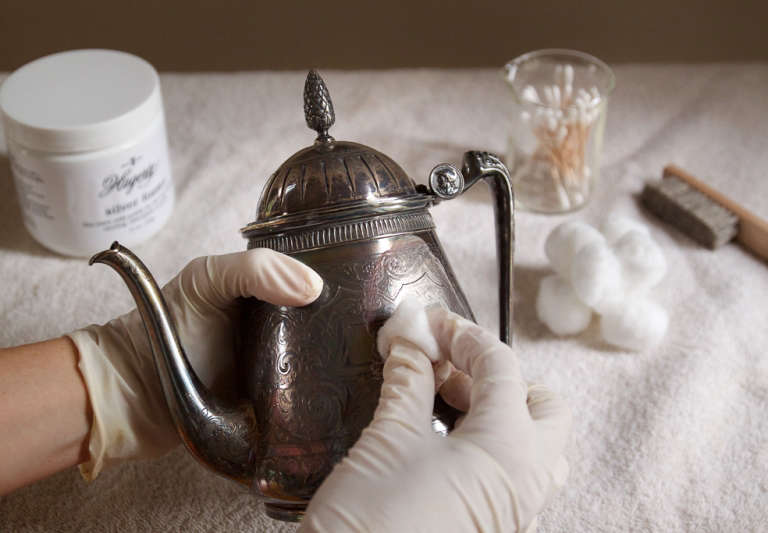
Step 1: Prep Your Work Area: Choose a well-ventilated room. Protect your work surface and the silver with a soft cloth or rag—I like to use an old terry-cloth towel. Wear latex gloves.
Step 2: Before applying polish, clean the silver with a natural bristle brush or soft cotton or flannel cloth. If necessary, wash off any old polish with a mild, phosphate-free soap and water. For candlesticks, be sure to remove any wax. I simply pour boling water over the candlestick to melt the wax.
If applicable, protect any wood or bone parts by sealing them with Renaissance wax.
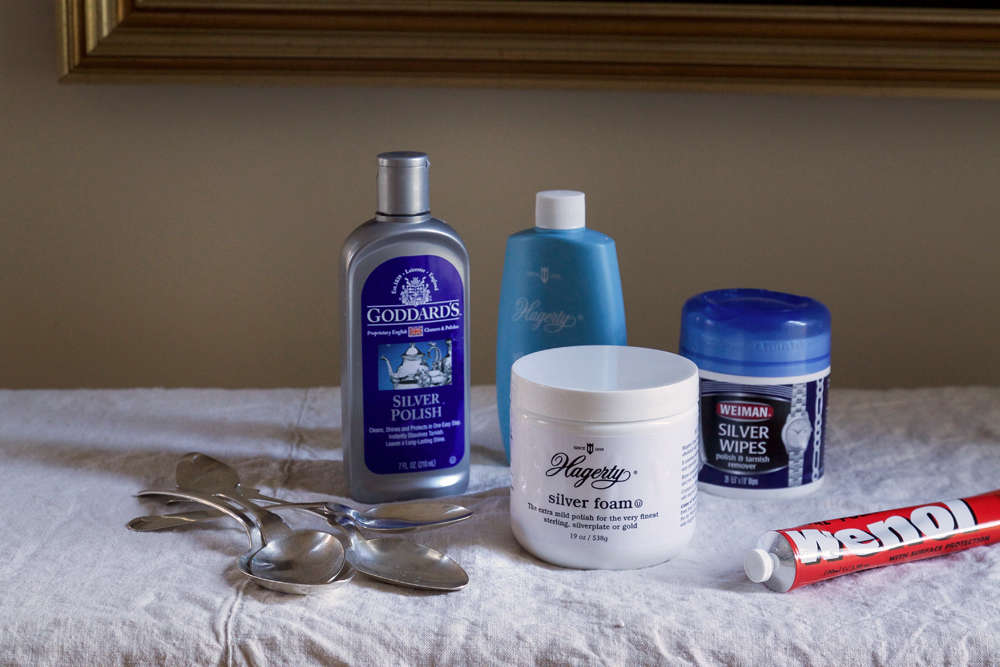
Step 3: Choose a Polish. Always start with the most minimally invasive approach by selecting the least noxious and abravise polish you can find. I chose Hagerty’s Silver Foam, which was recommended by many experts. It cleaned even my most tarnished silver well and gives off minimal fumes.
Avoid polishes with harsh chemicals such as ammonia. Liquid cream polishes are better. Never use old polish that has dried out. Avoid chemical dips, which strip the manufacturer’s patina and/or can cause pitting.

Step 4. Using a soft cotton ball or soft cotton cloth (not a dust rag with fibers that can get stuck in the designs) apply a minimal amount of polish. Rub gently in a circular motion. I found cotton balls to be the most effective and efficient. For hard-to-reach areas, such as the tines of a fork, a cotton swab works well. If tarnish is really dark or if your item has deep etchings, you may need to use a natural brush to gently work the polish in.
Work in small areas at a time, wiping away excess polish. Try not to let the polish dry on silver as this can scatch the surface.
Step 5. Rinse your piece thoroughly with warm water to remove any excess polish. Immediately dry with a clean cotton rag.
Commercial Silver Polish vs. DIY
Everyone loves to DIY, especially when led to believe they can use more “natural” and economical products found at home to replace harmful chemical solutions. But in the case of silver, if there was one consistency in all the research it was this: Resist home remedies.
Catsup, toothpaste, and cornstarch either don’t work or they contain salts or acid that is either corrosive to silver or can scratch and damage the surface.
One of worst DIY offenders is the oft-touted miracle cure which combines boiling water, baking soda, and aluminum foil. Yes, it quickly removes the tarnish, but it also strips the beloved patina. Plus, leaving silver in this solution too long can cause it to become pitted.
My recommendation for those looking to minimize the use of commercial cleaners is to follow proper methods of care and use outlined above. Another option is to use silver restorer Jeffrey Herman’s mild, “earth-friendly” alternative called Herman’s Simply Clean Collector’s Silver Polish; $13.95.
Die-hard DIYers can try the same method that professionals use: mixing precipitated calcium carbonate with deionized water to form a thick paste.

Silver Care Cheat Sheet
Do
- Use your silver as much as possible, but always wash and dry right away
- Store your silver in silver cloth or in closed cabinets along with china or glass
- Polish at the first sign of tarnish
- Polish with a mild professionally developed product or precipitated calcium carbonate mixed with deionized water
- Clean with cotton balls or soft cotton cloth
Don’t
- Clean your silver using homemade recipes, especially anything with acids or salts
- Scrub with plastics or wiry bristles
- Put your silverware in the dishwasher
- Use chemical dips
For more domestic science stories, see:
- Our Editors’ 27 Best Cleaning Hacks
- How to Clean the Washing Machine (Trust Us, It’s Filthy)
- Object Lessons: The Humble Cotton Cleaning Cloth (Plus 5 to Buy)
N.B.: This post has been updated with new links; it was first published November 2018 on Remodelista.
Products in this Post:
-
Herman's Simply Clean Collector's Silver Polish
$13.95 USD from Jeffrey Herman
Join us on 


Have a Question or Comment About This Post?
Start the Conversation