
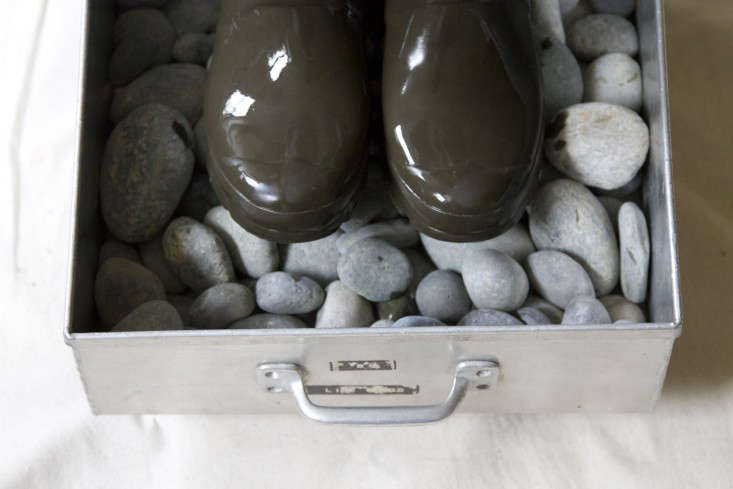
Even if you’re lucky enough to have a designated mudroom, a pair of wet and muddy boots can quickly make the space live up to its name in a not-so-good way. Here’s a solution for the mud-averse: a metal tray filled with beach stones where wet shoes can drain without making a mess. It’s on wheels, so you can roll it out of sight in a small space.
Read on for materials and step-by-step instructions:
Photography by Erin Boyle for Gardenista.

Materials
- 1 metal box (I used a vintage airplane drawer; a similar rectangular Galvanized Metal Trays is $39.50 from Pottery Barn)
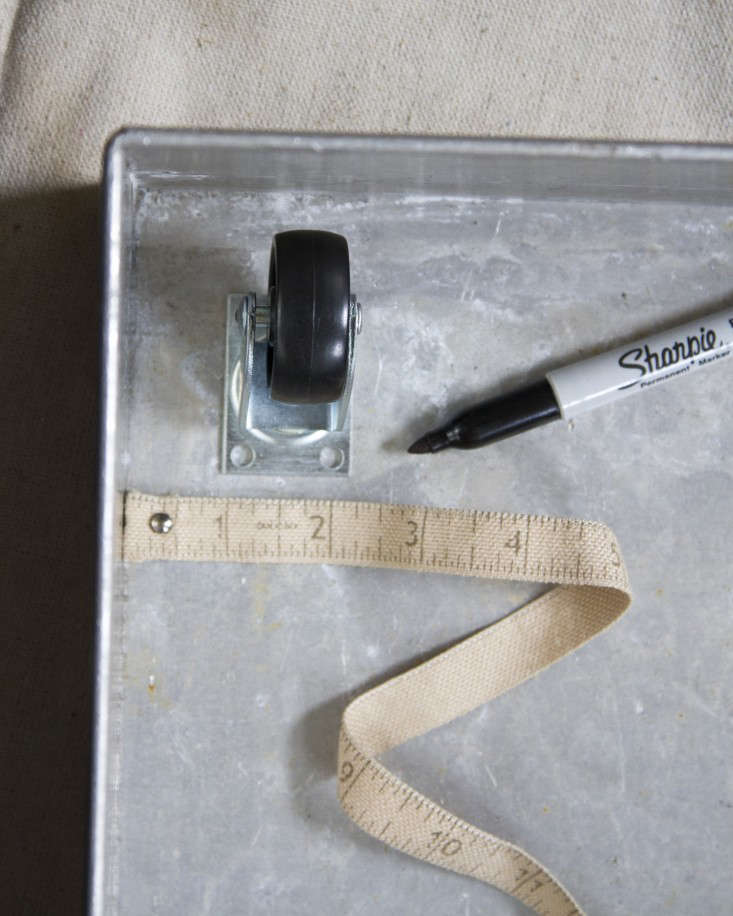
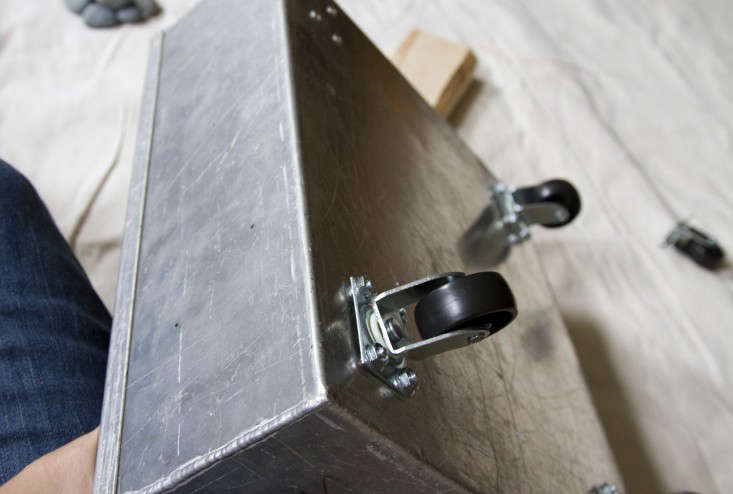
- 4 1-1/4-inch Casters; $2.39 each from Home Depot
- 16 Round-Head Machine Screws; $5.60 for a pack of 100 from Home Depot
- 16 Machine Screw Nuts; $1.18 for 12 pieces from Home Depot
- 32 3/8-inch Zinc-Plated Flat Washers; $3.14 for 25 pieces from Home Depot
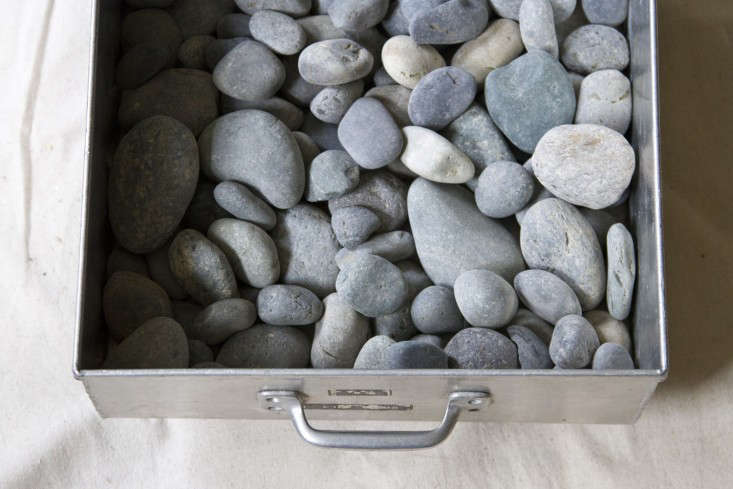
- Mexican Beach Pebbles; $25.99 for 0.5 cubic feet from Home Depot
- Drill
- Marker
- Measuring tape
- Scrap piece of 2-by-4 lumber


N.B.: If you don’t want to drill, you can make a simpler, non-rolling version of this boot tray by filling a low-sided jelly roll pan with a layer of rocks. An Uncoated Large Jelly Roll Pan measuring 16 3/4 by 12 inches is $14.44 at Amazon.


Are you the market for a new pair of garden shoes? See 10 Easy Pieces: Garden Clogs and Ankle Boots. Does your lackluster mudroom need sprucing? Get inspired with Storage: Entryway and Mudroom Roundup on Remodelista.
For more small-space DIY projects, see:
Products in this Post:
-
Galvanized Metal Trays
$39.50 USD from Pottery Barn
-
Shepherd 1-1/4 in. Caster Rubber Wheel
$2.39 USD from The Home Depot
-
Phillips-Slotted Round-Head Machine Screws
$5.60 USD from The Home Depot
-
Everbilt #8-32 tpi Zinc-Plated Machine Screw Nut
$1.18 USD from The Home Depot
-
Everbilt 3/8 in. Zinc-Plated Flat Washer
$3.23 USD from The Home Depot
-
Mexican Beach Pebbles
See Bedrock Boulders & Landscape Products for Price
-
Chicago Metallic Commercial II Traditional Uncoated Large Jelly Roll Pan
$17.18 USD from Amazon


Have a Question or Comment About This Post?
Start the Conversation