Close

Before & After: The $350 Kitchen Overhaul with Smart Storage, Thanks to Ikea and Home Depot

What do you do when you’re not at work? Brooklyn ceramic artist Suzie Ryu and painter/furniture designer Kana Philip both have demanding jobs during the week—she’s a marketing director, and he’s the cofounder of content-sharing platform 8. On weekends, they can often be found in Chatham, New York, making a dent on their DIY house remodel. Take a look at what they were able to accomplish in two weekends for just under $350.

Photography by Suzie Ryu.
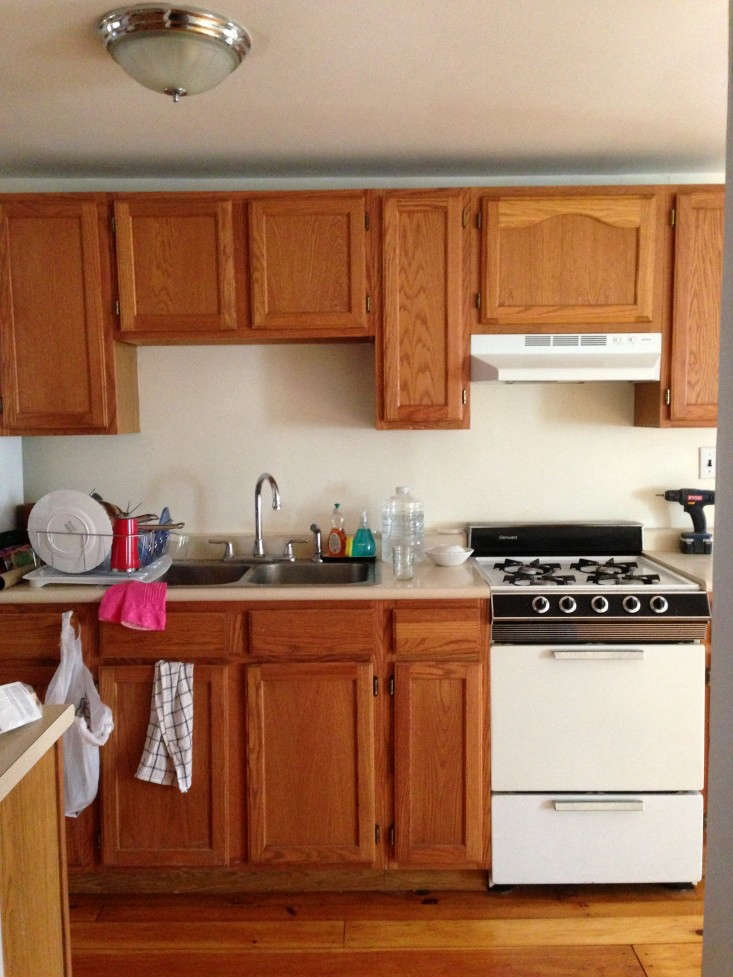
Before

Suzie and Kana arrive every Friday night to their 1930s house, known as The Schoolhouse because it has an 1812 school attached to it. (“The school was rolled down the road after the house was built,” says Suzie.) They only have 48 hours there every week, but they manage to get a lot done.

The compact kitchen overlooks the sun porch, which Suzy and Kana turned into their bedroom.
Above: The compact kitchen overlooks the sun porch, which Suzy and Kana turned into their bedroom.
The cupboard and vent removal took place over a winter weekend (during which three pipes burst), and the wall spackling, sanding, and painting the following weekend.
Above: The cupboard and vent removal took place over a winter weekend (during which three pipes burst), and the wall spackling, sanding, and painting the following weekend.

In Progress

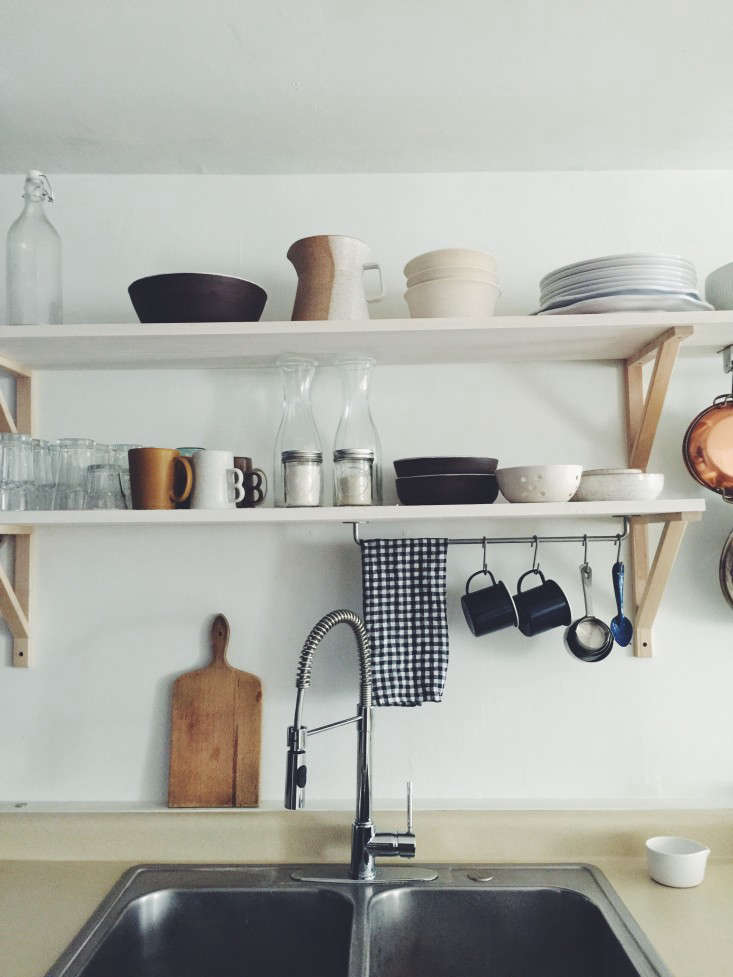
After setting up their bedroom, Suzie and Kana opened up the 1980s kitchen in the main house by removing the dark upper cabinets and replacing them with open shelving and Ikea pot racks.
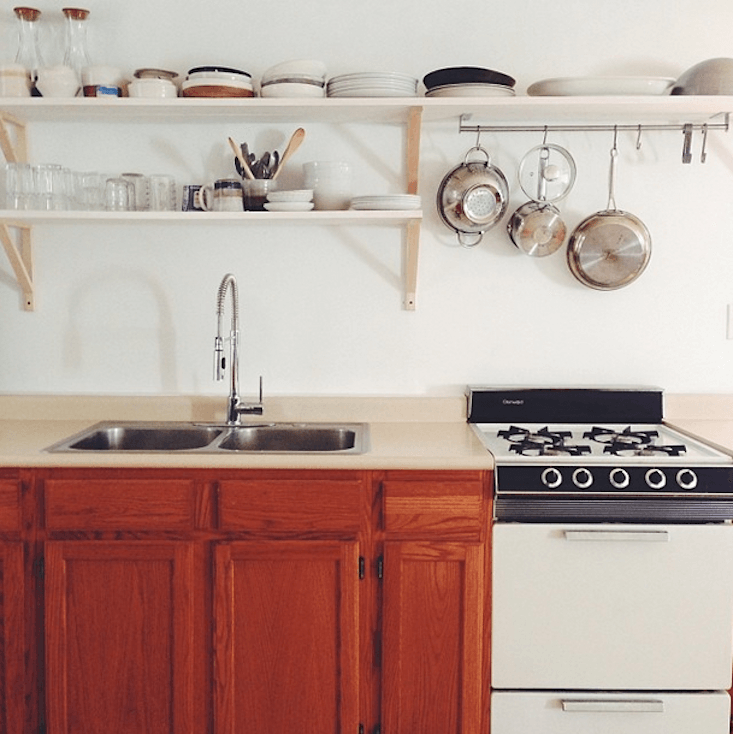
The cabinets awaiting paint. Here’s Suzie’s description of the open-shelf prep: “First we measured the length and depth we wanted. We decided to run two six-inch-deep boards across our brackets to have an approximate shelf depth of twelve inches. We knew we wanted to run one shelf along the whole length of the wall and have a shorter one running over the sink but not over the stove, so we took our measurements accordingly.”
Above: The cabinets awaiting paint. Here’s Suzie’s description of the open-shelf prep: “First we measured the length and depth we wanted. We decided to run two six-inch-deep boards across our brackets to have an approximate shelf depth of twelve inches. We knew we wanted to run one shelf along the whole length of the wall and have a shorter one running over the sink but not over the stove, so we took our measurements accordingly.”

After

Trollhagenco-theschoolhouse-kitchen-remodel-Remodelista-1
Above: The lower cabinets received two coats of brushed-on Behr Ultra Pure White in matte from Home Depot. They left the speckled laminate counter and fixtures as is. Suzy and Kana like the look of the hardware-free paneled drawers and doors now that they’re white and say they’re holding up well.
Trollhagenco-theschoolhouse-kitchen-remodel-Remodelista-2
Above: The shelves are Home Depot pine boards that the couple painted with a roller for speed and then brush-finished because they prefer a handmade look. The walls, shelves, and cabinets were all painted Behr Ultra Pure White paint in matte. (Suzie notes that in hindsight it would have been smart to paint the under shelves matte and the top gloss for easy cleaning.) The brackets are Ikea’s Ekby Valter, since discontinued (for a similar look, try the Sandshult). And the hanging bar and S hooks are from their now-discontinued Grundtal line (for a similar look, try their Kungsfor rail and S hooks).

Trollhagenco-theschoolhouse-kitchen-remodel-Remodelista-3
Above: The shelves are stocked with Suzie’s own ceramics.
Vintage blue enamelware collected locally and white enamelware from Valley Variety in Hudson, New York.
Above: Vintage blue enamelware collected locally and white enamelware from Valley Variety in Hudson, New York.
Trollhagenco-theschoolhouse-kitchen-remodel-Remodelista-4
Above: Suzie replaced the existing leaky faucet with a Glacier Bay Single Handle Pull-Down Sprayer Faucet that she picked out at Home Depot—”it was $170, our biggest expense.” She did the installation herself by watching YouTube videos on how to remove an old faucet and put in a new one (here’s one that she recommends).

See more DIY kitchen overhauls:

Find more kitchen storage ideas here:

And on Gardenista, read Michelle’s kitchen renovation wisdom:

N.B.: This post is an update; the original story ran on Remodelista on March 19, 2015.

You need to login or register to view and manage your bookmarks.

No more results!

Haven't found what you are looking for? Try seaching!

v5.0