

Lately we’ve been admiring DIY kitchen makeovers involving little more than paint applied to dreary wooden cabinets. How to best tackle such a project on your own? For advice, I turned to Albert Ridge of Ridge Painting in NYC. Albert, who grew up in County Galway, Ireland, and his crew are known in my northern neck of the city as the most meticulous, top-of-the-line house painters around. Having watched them work miracles on my own battered midcentury kitchen, I asked Albert to give us his top tips.
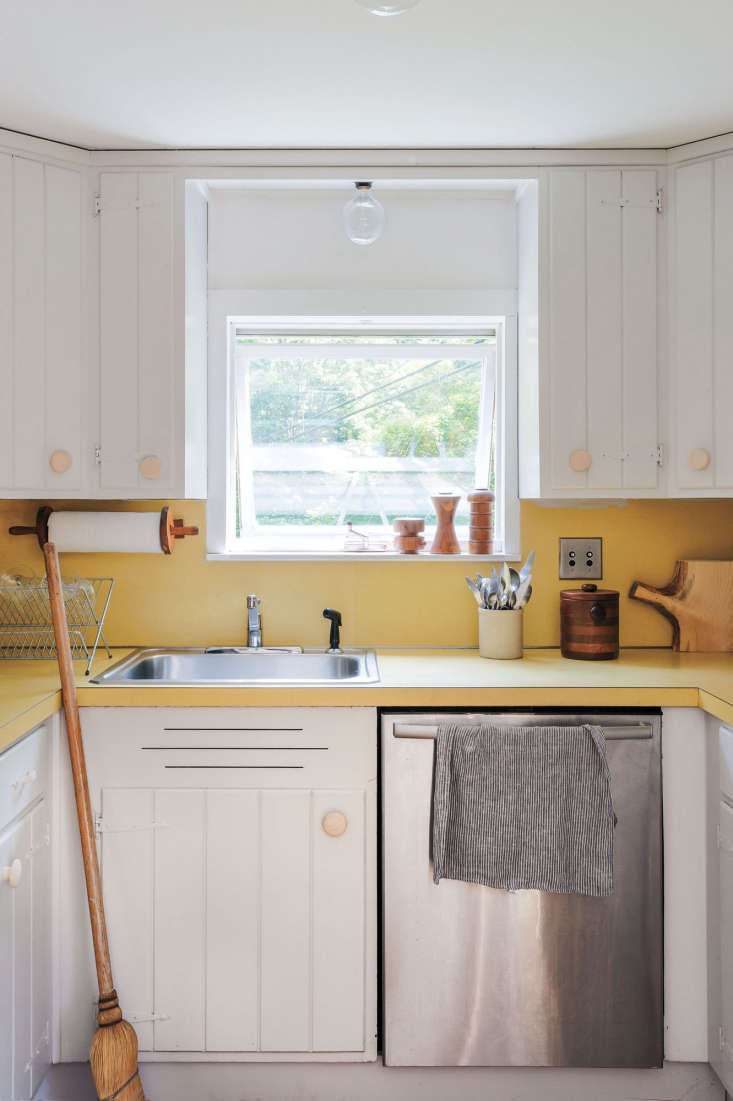
Above: Architects Robert Highsmith and Stefanie Brechbuehler of Workstead refreshed their dark and outdated upstate New York kitchen with paint and hardware store unfinished wooden knobs. They covered the cabinets, metal strap hinges included, with a Benjamin Moore color match of Farrow & Ball Lamp Room Gray, a soft gray.
1. Wood is the best cabinet surface to paint.
Unfinished, painted, and stained wood all work well, as does MDF, compressed/faux wood. In truth, any material that you can scuff up with sandpaper so that paint adheres is viable. That’s why laminates aren’t a good choice–you can paint them, but it won’t be long-lasting. Note that stained wood and glossy finishes have to first be de-glossed; I use a liquid sander, Wil-Bond, that’s applied with a rag.

Above: Abbey and Phil Hendrickson transformed their kitchen by painting the cabinets in Forest Canopy, a deep, deep green Valspar Paint, and a white from Home Depot (specifics since forgotten). See more, including the Before shots, in A DIY Kitchen Remodel for Under $500.

Above: In progress: the Hendrickson’s DIY kitchen overhaul in Owego, New York.
2. The prepping is as important as the painting.
Begin by emptying the cabinets completely and then clean thoroughly, making sure all grease and dirt are gone. Remove knobs and handles and check hinges. Remove drawers and label so you know where each belongs. (Cabinets, too, can be entirely removed and spray-painted in a commercial setup, but that’s a bigger job and hard to pull off on your own.)
Carefully tape off paint-free parts, such as hinges, countertops, and appliances. Use a wood filler to repair holes and imperfections–I like Elmer’s fillers. Finally, sand cabinets: A rotary sander works well on flat areas. Hand sand the hard parts and don’t overlook the cabinet door edges. If your cabinets are stained, use a 220 sandpaper. If they’re painted and there’s a rough stipple that looks like orange peel, use a 120-grade sandpaper before going to a finer one. And if there’s so much paint that the surface looks like crocodile skin, consider stripping–Rock Miracle is really good.
Above: Doors primed, painted (with Farrow & Ball’s Pigeon), and ready for installation in Sarah Sherman Samuel’s LA kitchen.
Above: Sarah installs the doors in her kitchen, a combination of Ikea cabinets and bespoke fronts. Read about her remodel in Ikea Upgrade: The SemiHandmade Kitchen.
3. Primer is, well, prime.
After you’ve thoroughly prepped, priming is crucial. All-in-one primer and paint products are to be avoided; they don’t do either job well. In truth, oil primer and paint adhere the best and give the longest-lasting results on cabinets, but because of VOCs, oil is outlawed in many states, including New York. (Read our post All You Need to Know About VOCs in Paint.) A good alternative is water-soluble waterborne paint, such as Benjamin Moore’s Advance, which is something like a latex-oil combo. But note that it dries quickly, so it’s wise to add an extender that allows you to the time to get a nice finish without brush marks. And if you’re painting something plasticky or otherwise hard to paint, Stix is a good primer to know about.
Going from a dark cabinet to light? Consider tinting the primer to match the final color. If your color transition is extreme, you might instead add a coat of underbody, such as Fresh Start, a thicker, less transparent primer that hides more (and can also be tinted). You can have the tinting done in the paint store; I request 75 percent of the final color, so it’s lighter but close. (For more on the topic, read Back from Black, Meredith’s repainting chronicle.)
Also note: After your base coat dries, it’s important to sand the cabinets all over again–just not as aggressively as the first time.

Above: Designer Michael Scherrer upgraded her Pasadena kitchen by removing the doors altogether and painting the cabinets white. She mixes her own paints using Fine Paints of Europe or Benjamin Moore Regal and Cal-Tint Universal Colorants. Tour her house and read more about her approach to paint in the Remodelista book.
4. Spring for quality paint.
Don’t be penny wise and pound foolish. You’ll get better coverage and results using quality paint. I like Fine Paints of Europe for oils and primers, and Farrow & Ball, Benjamin Moore, and Pratt & Lambert make good waterborne paints and latexes. (The one I use most often is Benjamin Moore Advance.) Two coats of paint are essential for cabinets–you’re building a surface. By the way, to get the nicest finish, use a brush, a 2- to 2 1/2-inch fine bristle brush.
Whatever paint you use, ventilate the room–direct a fan out the window–and wear the masks they sell in paint stores. And keep things clean: A painting project should not look like a war zone.

Above: Cabinets in Alabaster from Resene in New Zealand blogger Gem Adams’s DIY Kitchen Remodel. New hardware, such as Gem’s DIY leather pulls, also go a long way to refreshing a kitchen.
5. Semigloss, gloss, or satin–the harder the finish the better.
Matte paint on kitchen cabinets is impractical; I wouldn’t even use eggshell finish. You want a surface that’s durable and wipeable, so you won’t be painting again for at least a few years.

Above: The power of paint: Remodelista reader Danielle Arceneaux’s DIY Kitchen Remodel for Under $500 (go to the post to see the Before). She used Benjamin Moore Advance Alkyd Paint in White Dove.

Above: Suzie Ryu and Kana Philip’s Chatham, New York, weekend house; see more at $350 DIY Kitchen Overhaul in Two Weekends–proof that sometimes a less-than-perfect paint job does the trick.

Above: A Before shot of Suzie and Kana’s kitchen.
Go to Palette & Paints to find more Remodelista favorites and advice, including How to Choose the Perfect Shade of White for Your Room.
Products in this Post:
-
Lamp Room Gray No. 88
$97.00 USD from Farrow & Ball
-
See for Price
-
Benjamin Moore's White Dove Paint
$69.99 USD from Benjamin Moore


Have a Question or Comment About This Post?
Start the Conversation