

File this one under trial and error: I started the project with high hopes of making a 2-gallon cement planter that I could stock with a variety of succulents. But while struggling to free the large planter from its mold, I dropped it on the ground, rendering it into…concrete chunks. The good news is I still ended up with two adorable mini concrete pots.
I was surprised when my large planter broke. Shouldn’t concrete withstand a measly 2-foot fall from a table onto a wooden deck? I consulted a carpenter friend of mine who informed me that “concrete doesn’t reach its strength threshold until three or four weeks after it’s dried,” and “it will get stronger over time.” I’m taking note of that for my next attempt at working with concrete.
Read on for the full story (and step-by-step instructions to make your own):
Photography by Dalilah Arja.

Above: The materials for this project set me back $30. Sourcing molds is the easiest part; you can use old food packaging, bottles, or cans. I collected takeout containers to use as molds for the mini planters.
Ingredients
- Concrete mix (I used a 10-pound bag of Quickrete Mix)
- Water
Materials
- Mixing bucket
- Mason’s or garden trowel
- Planter molds
- Dust mask
- Utility knife
- Drill and masonry bit (if you want to make drainage holes)

Step 1: Mix the concrete according to the instructions on the package. If you use Quickrete, you’ll need to add from 1.5 to 2 cups of water to every 10 pounds of mix. Be sure to wear a dust mask, as particles go flying when the dry mix is dumped into a bucket.

Step 2: To start setting the molds, shovel a generous amount of mix into a container. With a little elbow grease, shimmy a smaller container into the concrete, leaving at least a half-inch of mix in place beneath the smaller container to form a base.

Step 3: Leave the molds to dry in a sunny spot for form 24 to 48 hours; the longer the better. After the planters have set, use a utility knife to cut and remove them from the molds.
Step 4: Use a drill and masonry bit to make small drainage holes in the bottom.

Step 5: Add potting soil to the containers–and plants of your choice. I like the contrast of fat, pillowy succulents against the texture of the concrete planters.
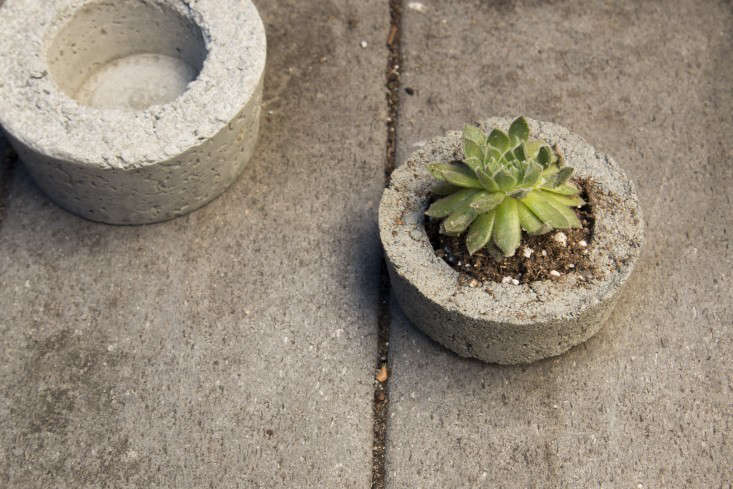
Above: Finished planters. Originally, I purchased sand paper to soften the edges, but I decided I like their imperfect roughness.

Above: Mini concrete planters next to a pot of kitty grass.


Have a Question or Comment About This Post?
Start the Conversation