

Welcome to Your Weekend Project, featuring how-tos and ideas from our archives for an organized and inspired home.
I have only good memories of walk-in closets, except for the time I was rummaging around in the back of one–and suddenly came across a high-top sneaker with two kittens sitting in it.
It was a charming scene really, with one tiny kitten gnawing on a shoelace and the other batting at his brother with a fuzzy paw, unless you stopped to consider the cold facts of the situation. My closet was so stuffed with clothing that I hadn’t noticed when my cat gave birth to a litter in there several weeks earlier.
How do closets get so overcrowded? How does a pair of blue jeans you had in college manage to surreptitiously elude the Salvation Army dragnet for decades to follow you as you move across the country, back and forth and back again, to each new walk-in closet?
Yet. When I remodeled my house last year, No. 1 on my wish list was a walk-in closet. Less than nine months later, the closet is already a shambles. By last week, every time I tried to walk in, a stray shoe would trip me. The sleeves from blouses were twining themselves, anaconda style, around my neck.
It was time to clean out the closet, drastically and once-and-for-all. I was sick of feeling as if my clothes owned me. I came up with a new strategy: Define the season’s wardrobe as minimally as possible–I pared down to 10 pieces–and put everything else into organized deep storage. I know 10 pieces sounds pretty draconian. But if you look at a weather map, you’ll see most of us live in climates defined by three-month stretches that don’t vary that much. And more minimal is always more peaceful.
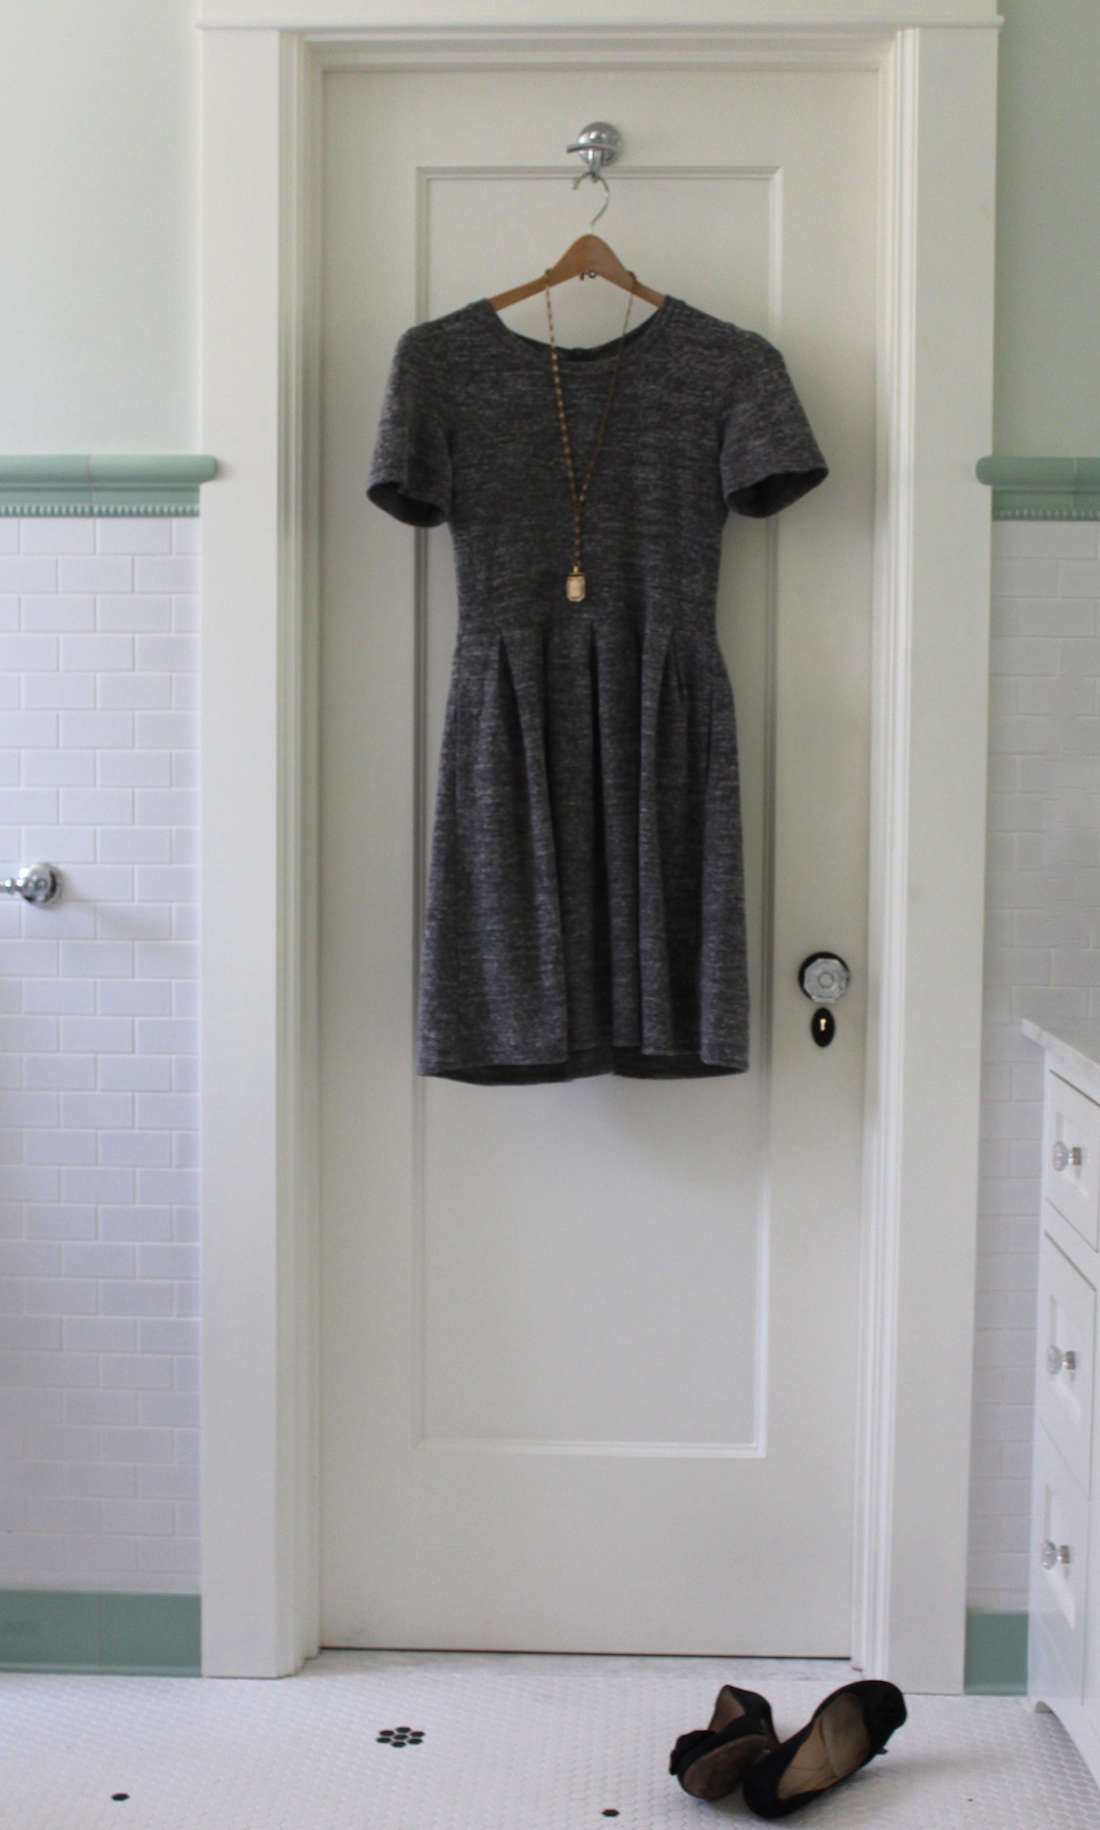
My 10 essential pieces include jeans, black pants, khaki pants, a knit dress, a pencil skirt, two collared shirts, a cardigan, a blazer, and a white T-shirt. Here’s how to pare down your closet to your own personal 10 essential pieces.
Have you ever whittled your wardrobe to a few key items? Tell us about it in the Comments section below.
Photography by Zoe Quittner (except for featured image of coat rack, courtesy of Ambivalenz).

Step 1: Confront your closet.
Can you even see what’s in there? Start the cleanout by reaching in to grab every piece of clothing you love. Note: If you hesitate over an item for even a second, you don’t love it.
Place the clothes you love on your bed. Arrange the articles by type: jeans, pants, shirts, etc.
Step 2: Do an assessment.
Examine the items on the bed to see if a theme emerges. Is everything blue? Perhaps you chose clothes made only from comfortable fabrics. Did you choose only your best-fitting pair of jeans? Did you leave all the skirts in the closet?
By examining the clothes you love in a vacuum–that is, without the rest of your wardrobe surrounding them and clamoring for attention–you will see a pattern. Maybe you like striped shirts best. Or maybe you really only feel comfortable in black. Next time you’re on the verge of a purchase, think back to this moment: How would the new piece you’re considering fit in with your favorites?
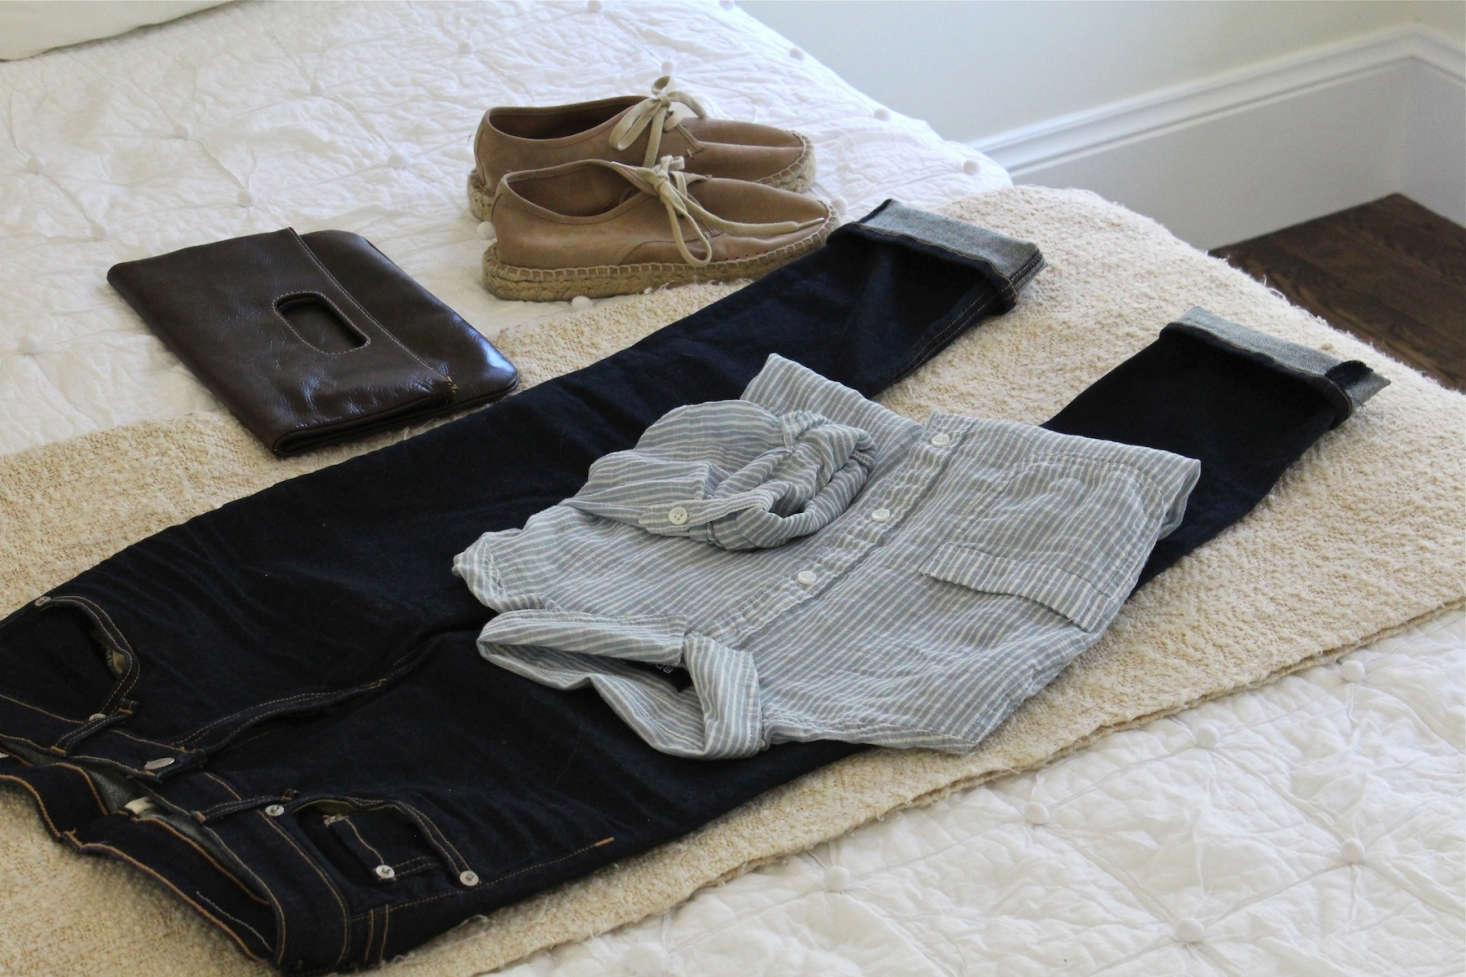
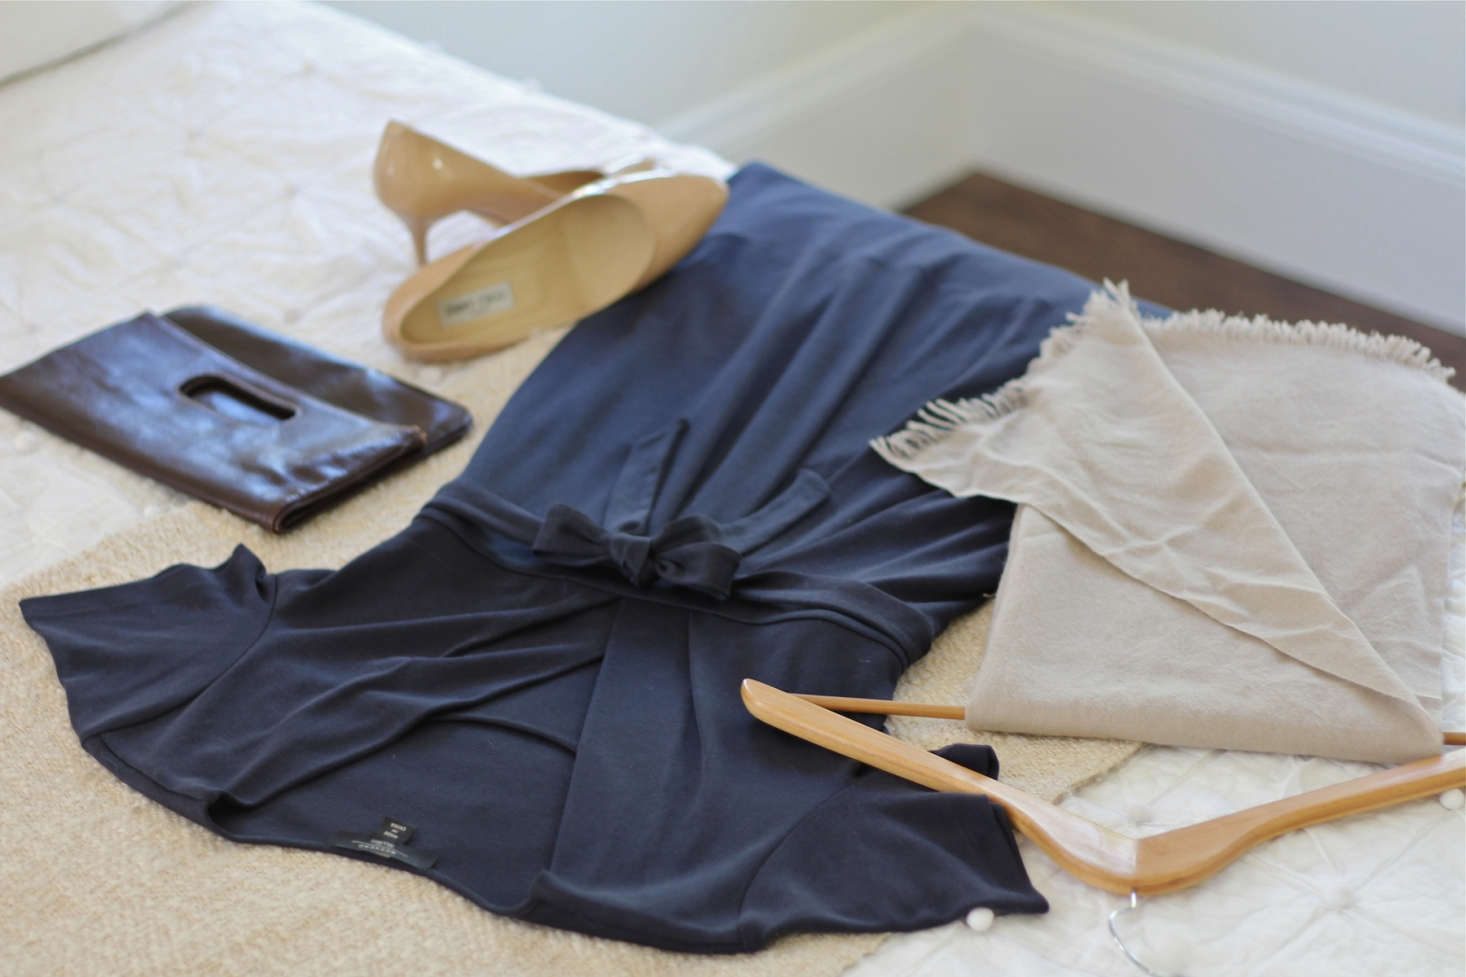
Step 3: Make outfits.
How many different ways can you mix key pieces to create different looks? Lay out as many ensembles as possible. (Power user tip: Snap photos with your phone of each outfit; when you wake up tomorrow morning and can’t decide what to wear, you can remind yourself of the possibilities.)
Step 4: Edit, edit, edit.
Are there favorite pieces that didn’t make the cut when you were putting together outfits? Take them off the bed.
Step 5: Double-check.
Ask yourself: Is there an essential piece missing? If you go back to your closet to get a particular jacket or shirt or pair of pants that you now regret leaving behind, will that article of clothing enable you to create several more outfits? If so, grab it.
Step 6: Mend and tailor.
Repair, replace buttons, and iron every piece of clothing that needs attention. If an item doesn’t fit properly, take it to the tailor; shorten the sleeves, nip in the waist, lift a hemline to the most flattering length. If you don’t want to make that investment, get rid of the piece. Trust me, it doesn’t look good on you.
N.B.: Looking for more tips for caring for your clothes? See Expert Advice: 10 Wardrobe Maintenance Essentials.
Step 7: Store the rest.
Take everything else out of your closet and put it in deep storage. Organize these pieces by season when you pack them away. Maybe you are lucky enough to have a backup closet in a guest room where you can store it for now. If not, get some squish bags; with vacuum-sealed Add-On Module To The Garden Closet Larch ($12.99 for a package of three from the Container Store), you can suck the air out of the bag to store more clothes in a small space. (Three months from now, pull out the clothing and pick your favorites for the next season.)

Step 8: Whittle down your favorites.
Which were the 10 key pieces you used most often to create outfits? Put those back in your closet on hangers or shelves where they are most visible and accessible. Fold the rest of your favorites and if you are very brave, give them the squished bag treatment as well. If the thought of that gives you hives, put this second tier of favorites in the back of your closet; you can access them, but only in an emergency.
Step 9: Do a trial run.
Wear your 10 favorite pieces, in as many combinations as possible, for a week. See how that feels. If things are going well, try a second week. If you are missing a key piece, pull it out of the back of the closet; it’s not the end of the world if you wear 11 essential pieces of clothing.
Step 10: Pare down shoes and accessories.
Shoes, handbags, and accessories. This proved harder for me than culling clothes. I love shoes, and have many pairs. For the season, I pared down to three pairs: black flats, black heels, and espadrilles. (I also have a pair of running shoes, but running shoes are ugly and therefore don’t count as a pair of shoes.) I winnowed handbags to two–a neutral-colored bag with a shoulder strap and a tote big enough to hold my laptop. As for belts? One skinny, one wide.
I took three pairs of off-season shoes to the cobbler to get new heels and soles, and stored off-season handbags in cloth bags to protect them.
The Verdict:
It is now Day 3, post-cleanout. It feels pretty good. I am wearing the same jeans and the same shirt I would have been wearing even if my closet were still stuffed full of clothes. The challenge, I can see, is going to be keeping fewer items looking good: with more ironing, frequent laundering, and fewer stains from messy sandwiches eaten at my desk.
As for my closet? God, an almost-empty closet looks beautiful and so very serene. Not that I have anything against kittens.
This post is an update; it was originally published on Gardenista on December 26, 2013.
Looking for more decluttering inspiration? Be sure to check out:


Have a Question or Comment About This Post?
Start the Conversation